iOS app verification
An iOS app needs to be verified before you can receive any SKAdNetwork data or set up any conversion value mappings in Conversion Hub. Follow the instructions in this article to request and manage your iOS app verification.
Before you begin
Here's what you need to know before getting started.
Requirements
- Admin, Editor, or Custom Editor permissions
Why do I need to verify my app ID?
Once Adjust verifies your App ID, you can use Adjust's SKAdNetwork solution for your app.
SKAN postbacks are sent by Apple to the network running the ads, who can enrich certain fields before sending the postback on to Adjust. The postback only contains the explicit Apple App ID as an identifier Adjust can use to assign that postback data to a specific app within our system.
Since the Apple App ID is publicly available, app verification is essential to keep your data secure. It means that Adjust can check that you are the legitimate app owner, and no one can falsely add your app to the account and receive your app's SKAN postback data.
The full recording of the Beginners Guide to SKAN training can be found here.
1. Log in to App Store Connect with your Apple ID
Log in to your App Store Connect account using your Apple ID.
2. Collect authentication parameters
Adjust requires the following parameters to generate a JSON Web Token (JWT), and authorize requests to the App Store Connect API.
| Auth Parameter | Definition | Example |
|---|---|---|
| Issuer ID | Your issuer ID from the API Keys page in App Store Connect. | 57246542-96fe-1a63-e053-0824d011072a |
| Key ID | Your private key ID from the API Keys page in App Store Connect. | 2X9R4HXF34 |
| App Store Connect API Key | Your P8 API key, downloaded from App Store Connect. It authorizes access to your app data in App Store Connect.
| -----BEGIN PRIVATE KEY-----MIGTAgEAMBMGByqGSM49AgEGCCqGSM49AwEHBHkwdwIBAQQgNxUqm0R2vt4IrLAQr9gfDPixwSxH9wJZ6NV3X0ax4eWgCgYIKoZIzj0DAQehasda2ANCAAQx53AlofI4Of54lbR04A6D2QMbe0mt8+JtRHkJJCEUesUfySoZsm2jeh3qodLE0pZ2Rayv26qFMKuKEwemB2Op-----END PRIVATE KEY----- |
Find your Issuer ID
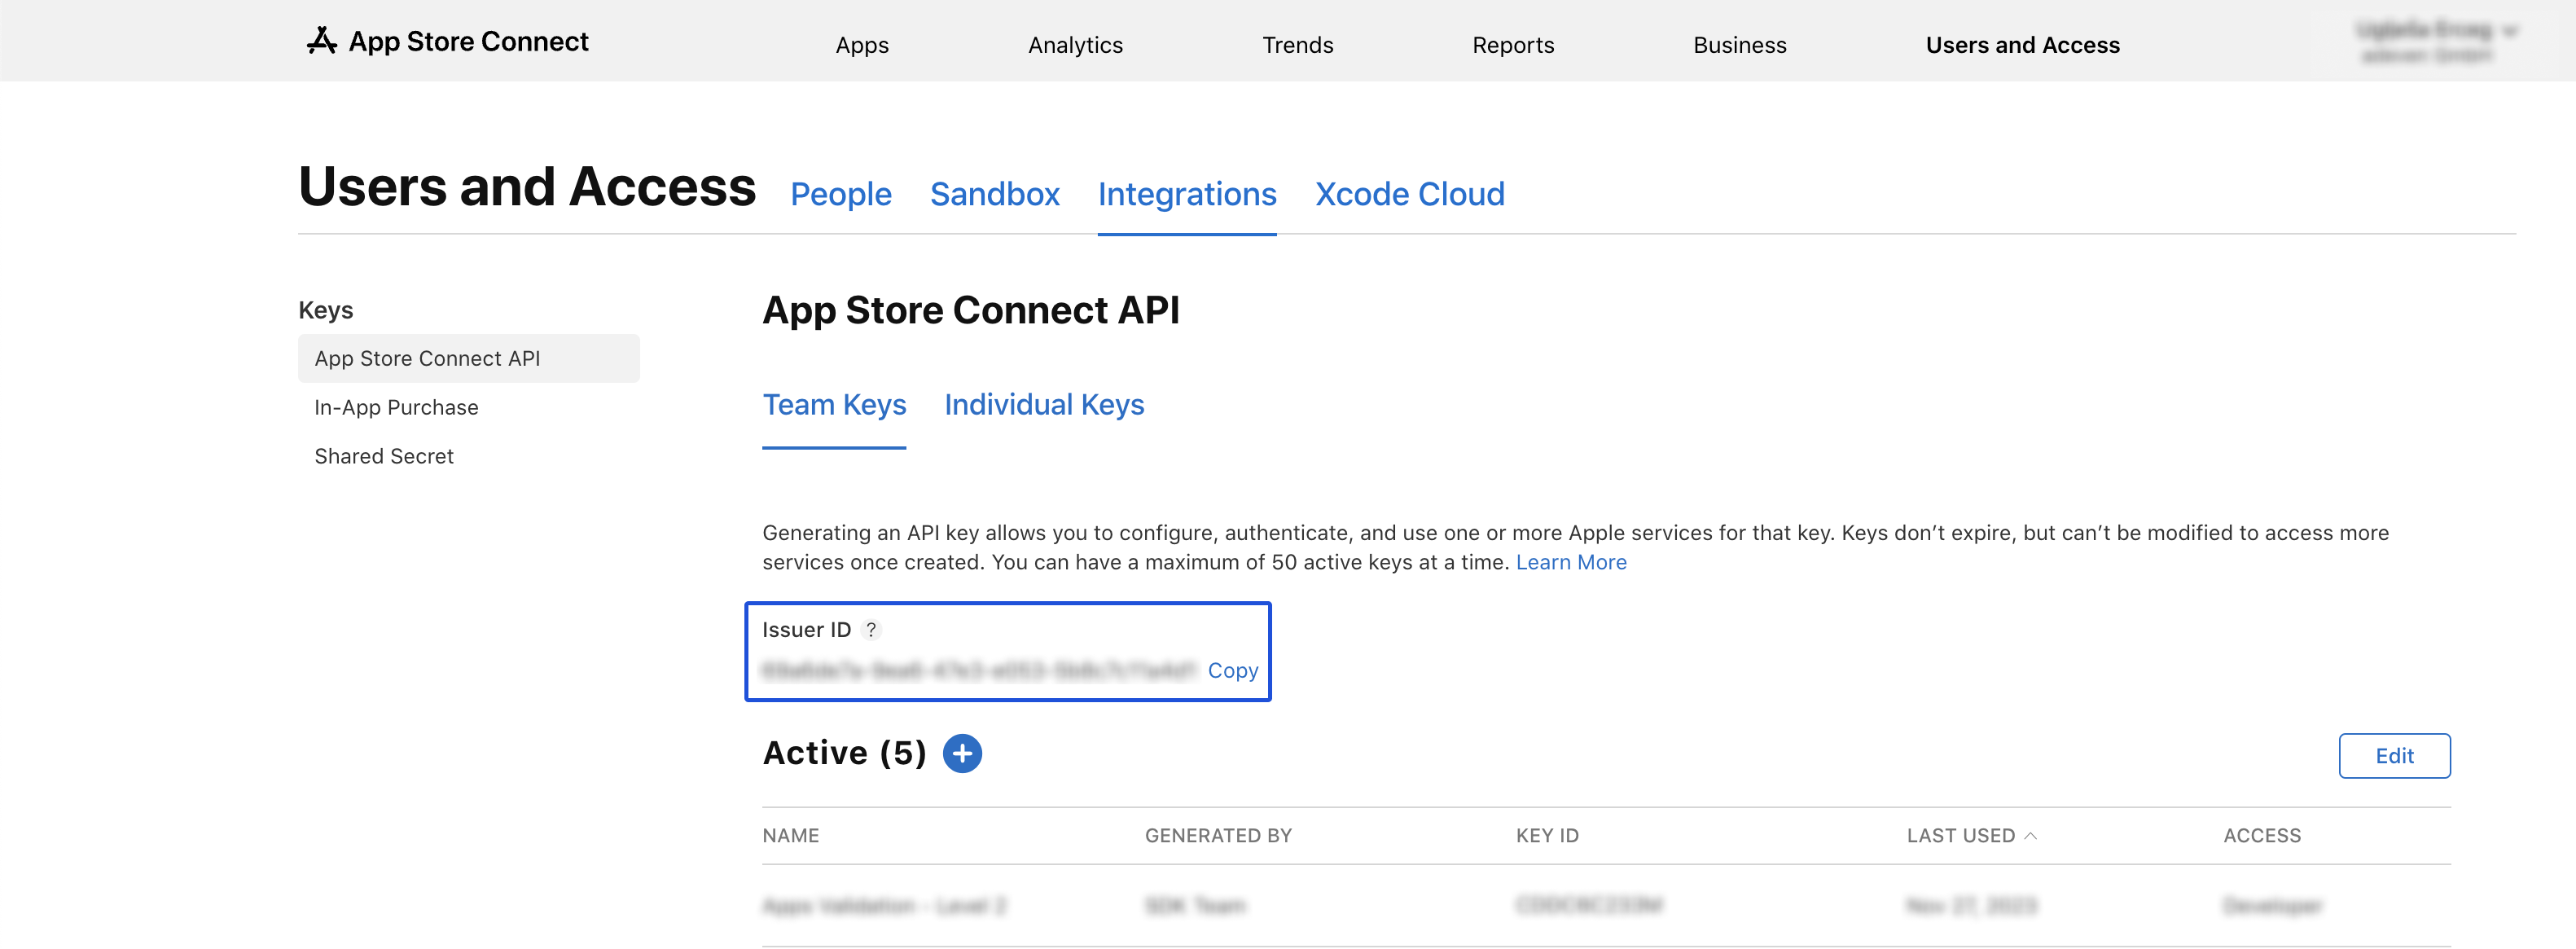
- In App Store Connect, select the Users and Access icon.
- Select the Integrations tab.
- Under the Key Type menu on the left, select App Store Connect API.
- At the top of the page, next to Issuer ID, select Copy.
Generate a new API key
The App Store Connect API authorizes access to your app data in App Store Connect. We recommend you generate an API key dedicated for Adjust verification. Sharing the App Store Connect API key with Adjust does not provide any services to Adjust and is required for your iOS app verification process.
- Select Generate API Key or + icon to create a new key.
- If you have not already requested API access in your App Store Connect account, complete the request to do so.
- In the Name field, enter a name for the key.
- In the Access field, select
Developeras the role. - Select Generate.
- Your new API key appears in the list of active keys with its Key ID.
- On the key you generated, hover over the value in the Key ID column. Select the Copy Key ID link that appears.
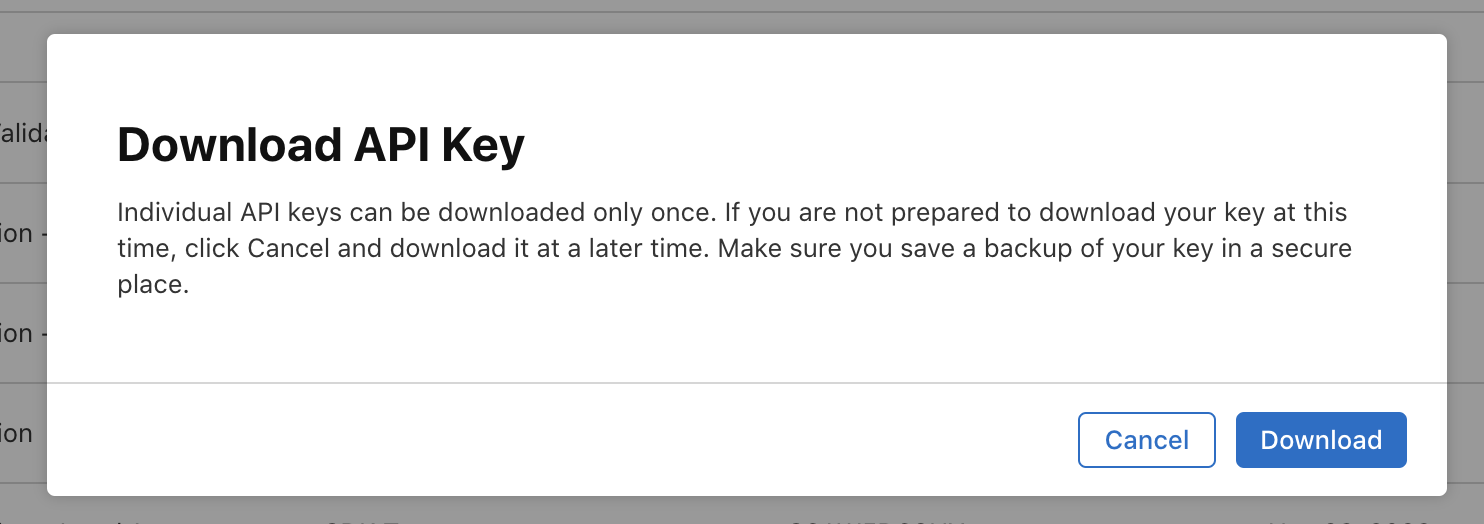
- Select the Download (
 ) icon.
 - Select Download to proceed.
- Copy the entire App Store Connect API key from the downloaded file.
3. Connect to App Store Connect in Connections
- From the overview in Connections select + New connection.
- Find
App Store Connectin the list of partners. - Select iOS App Verification as the service.
- Enter your Key ID.
- This is the key that you copied in Generate a new API key - Step 6.
- Enter your Issuer ID.
- This is the key that you copied in Generate a new API key - Step 4.
- Paste in your Private key.
- This is the key that you copied in Generate a new API key - Step 9.
- Select Connect.
After you request to connect your account, Adjust generates a JSON web token (JWT) and requests specific app information from the App Store Connect API.
If the authentication parameters you enter are valid, then the connection is set up. If there is a problem with the values you provide, you'll see an error.
4. Request app verification in AppView
To request that Adjust verify your app ID, follow these steps in the Adjust dashboard.
- Navigate to AppView > All apps.
- Select your app from the list.
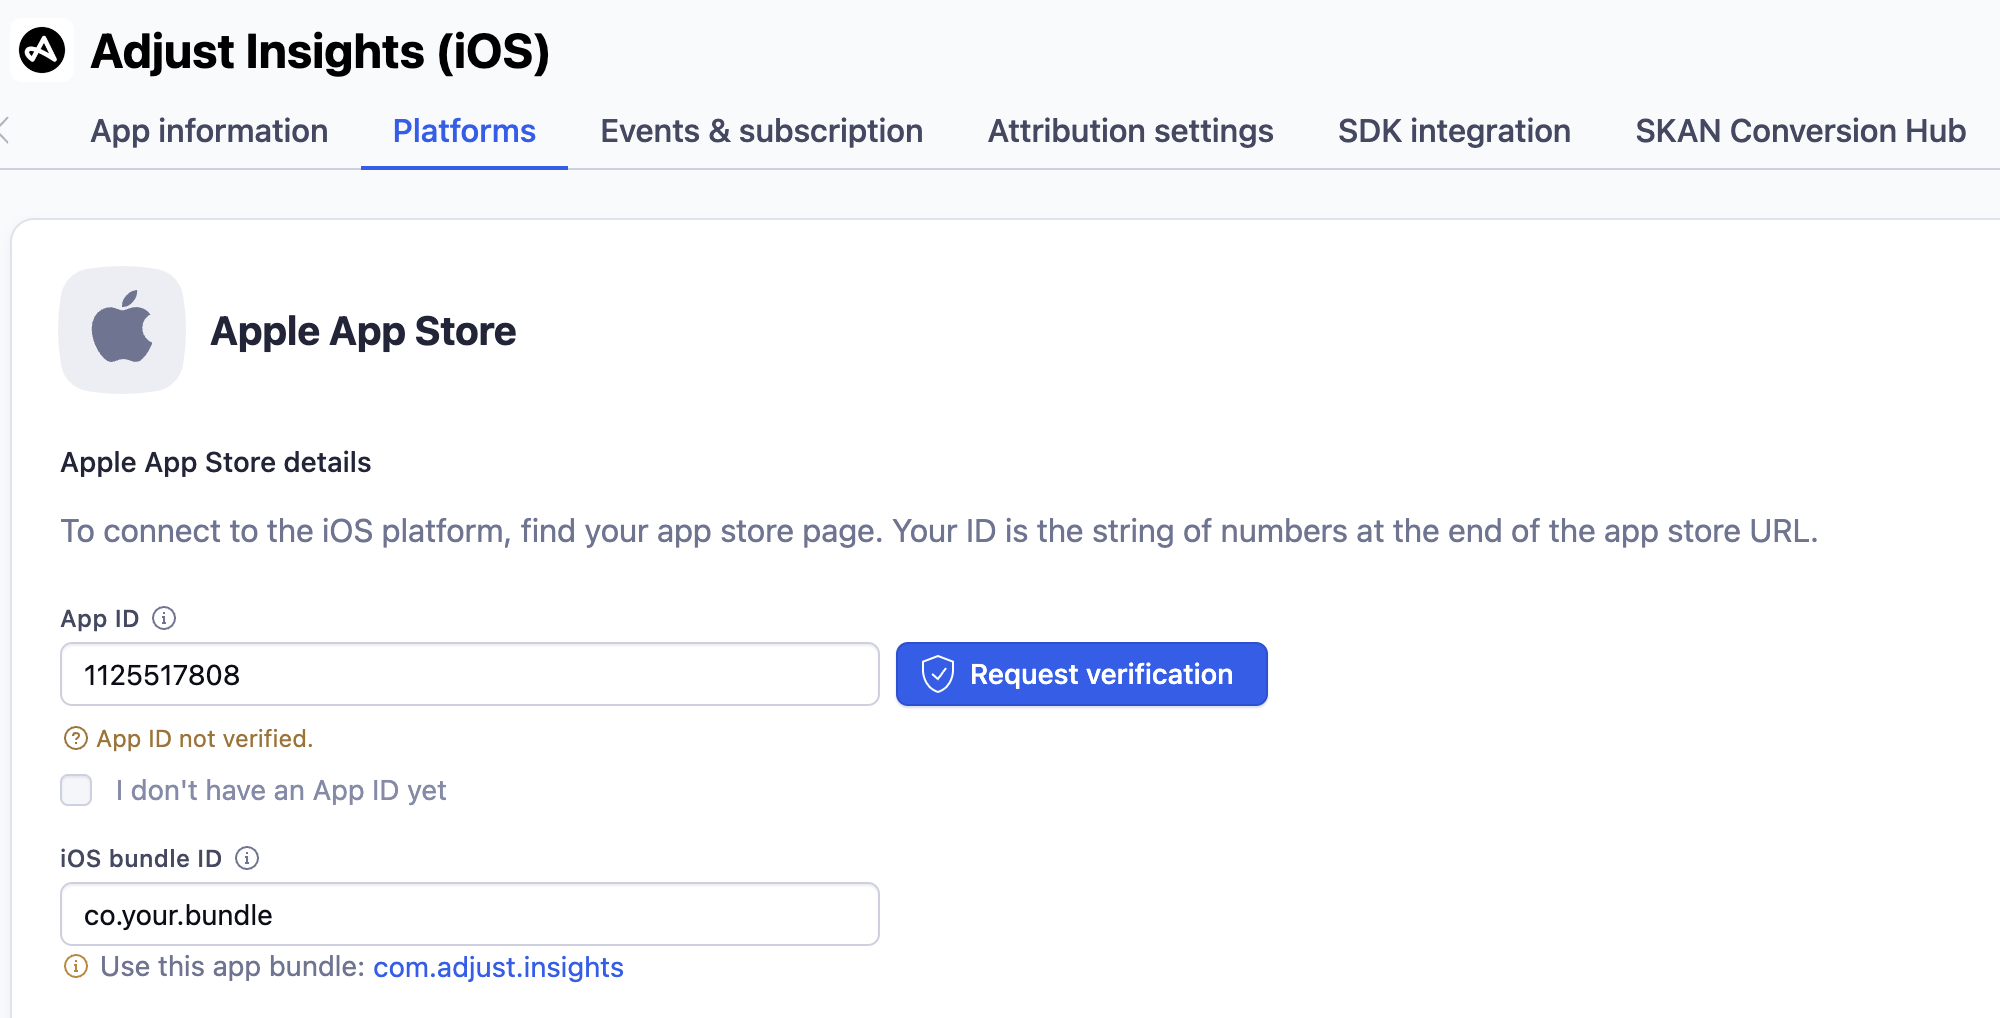
- Select the Platforms tab.
- Under
Apple App Store, enter your App ID. - Select Request verification.
- Check the app ID verification status as a badge on the App Store icon.
 Requested App ID verification, but App ID not verified – App Store icon displays a red badge with an iOS App ID verification requested message.
 App ID verified – App Store icon displays a green badge with an iOS App ID verified message.
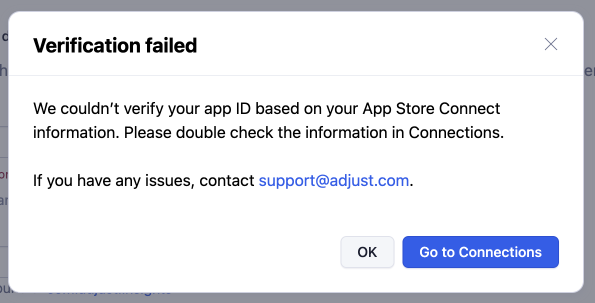
If there is an issue with verifying your app ID, a modal will display stating verification has failed.
If you have not yet entered your authentication parameters in Connections, select Go to Connections, and follow the steps under the "Connect to App Store Connect in Connections" section above.
If you have already entered your authentication parameters in Connections, double-check that the app ID you entered in the Adjust dashboard matches the app ID in App Store Connect.
Once you have entered the authentication parameters in Connections and you have confirmed that the app ID is correct, select Request verification again. If you are still receiving the error modal, this can indicate another issue (e.g., authentication parameters are valid, but are for the wrong App Store Connect account). Please contact your Adjust representative or support@adjust.com for further assistance.
5. Remove Connection and Revoke Key
Adjust only requires the connection to the App Store Connect API for a one-time verification of your iOS apps. Once you have confirmed that the verification is complete, we recommend removing the connection as a proactive security measure. Follow the below steps in the Adjust dashboard to remove the connection:
- Under DataWorks, select Connections.
- In the list of partners, select App Store Connect.
- Under the Actions column, select the Delete
icon.
- Select Delete.
When you are done verifying iOS apps, you can revoke the API key you created in App Store Connect by following the below steps:
- Log in to your App Store Connect account using an Apple ID that has an admin role and has access to your apps.
- Select the Users and Access icon.
- Select the Keys tab.
- To the right of the Active keys section, select the Edit button.
- To the left of each key you want to revoke, select the checkbox.
- Select Revoke Key.
- Select Revoke.

 ) icon.


