Set up a SKAN 4 mapping
Set up your SKAdNetwork 4 campaigns with minimal work using the Conversion Hub.
For information about the differences between SKAN 4 and earlier SKAN versions, read our guide to how SKAdNetwork 4 works.
To set up a new SKAN 4 mapping for your app:
- Under AppView, select SKAN Conversion Hub.
- Select your app from the list.
- Select Map conversion values.
- When asked what SKAN version you are creating the mapping for, select SKAdNetwork 4.
- Select Advanced setup.

1. Check the postback schedule
We don’t recommend changing the default postback schedule or using a lockWindow for any of the three postbacks during the early testing phases. Instead, familiarize yourself with the schedule and select Next.

Optional: Add lockWindows
While we generally advise against the use of lockWindows, if you do choose to work with the feature then set it in the first measurement window. This lets you assess how well the campaign is converting. You can then use the subsequent second and third postbacks to get as much detailed data as possible.
From the default postback schedule, you can select  Edit to add lockWindows.
Set a static window: If the majority of your users perform a key event at a specific time after install, you can lock the window at this point to shorten the time you need to wait for the postback.
When you do this, you'll see a measurement gap shown on your schedule overview. This is the time between applying the SKAN lock and the end of the original measurement window. During this period, no measurement is recorded.

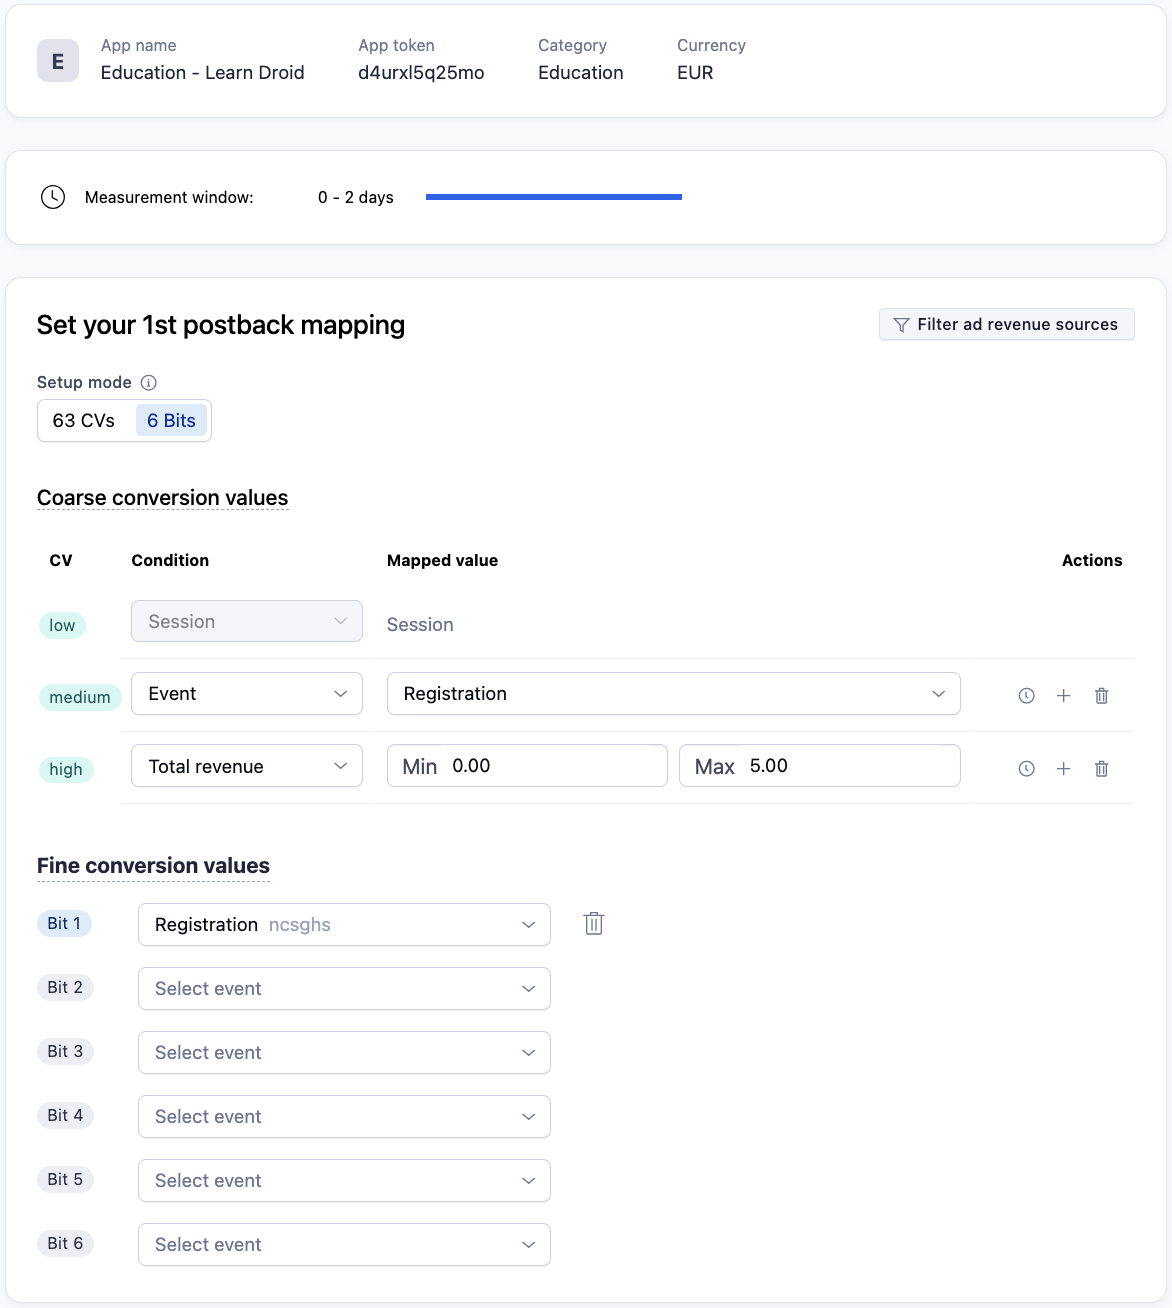
2. Configure the first postback
Configure your first postback to provide as much crucial information about the campaign performance as possible. This lets you decide whether to continue running it, pause, or make adjustments.
- Select your Setup mode.
- This defines whether you use 63 CVs or 6 bits.
- Map your coarse conversion values.
- Map your fine conversion values.
- Confirm that your SKAN 4 fine mapping is the same as your SKAN 3 mapping.
- If you set a new mapping for SKAN 4, you need to go and update your SKAN 3 mapping.

1st postback using 63 CVs
3. Configure the second postback
The second postback shares information from the measurement window of days 3-7. At this point, you may be interested to see if users were converted from a trial or have hit specific milestones, such as completing a purchase. As a result, these events should be given a higher value than, for example, completing a tutorial.
If you use early in-app event behavior for predictive analysis of users' life-time value, use this window to confirm whether the analysis was correct.
Tips for coarse value mapping
We recommend you use the coarse values to divide users into three groups:
High-value users: When you see a large number of high-value users, its an indication to continue and even scale-up the campaign.
Medium-value users: With a reasonable number of mid-value users you can continue running your campaign at the current level.
Low-value users: If you see a lot of low-value users, you should pause the campaign to avoid misspent budget.
To follow this approach, you need to identify which events from day 0 to 2 in the user journey are most important. The events you choose will be highly dependent on both your app vertical and monetization model.
4. Configure the third postback
The third postback shares information from the measurement window of days 8-35. You should have a clear profile of the user: they may have uninstalled the app or be inactive, or they may be consistently active and performing certain events.
As a result, you should build you mapping logic based on behavior at this stage in the app journey. For example, coarse values in this window should be mapped to key events that happen after day 8. This might include a certain revenue amount earned, or users retained.
You can also continue to use the data from the third postback to validate and predictions made during the first days after install. Keep in mind the tips for coarse mappings.
5. Review and save mapping
Once you have finished configuration of all postbacks and measurement windows, you can review your settings and save the mapping.
Analyze your data
You can analyze your SKAN 4 data in Datascape using Adjust's dedicated SKAN dashboard. You can also set up data exports to analyze your raw data using cloud storage uploads or server callbacks. This lets you perform your own analysis and further optimize your iOS campaigns.